Directions
-
Preheat your oven to 325°F (163°C) to create the perfect baking environment. A steady temperature is crucial for achieving that tremendous creamy texture.
-
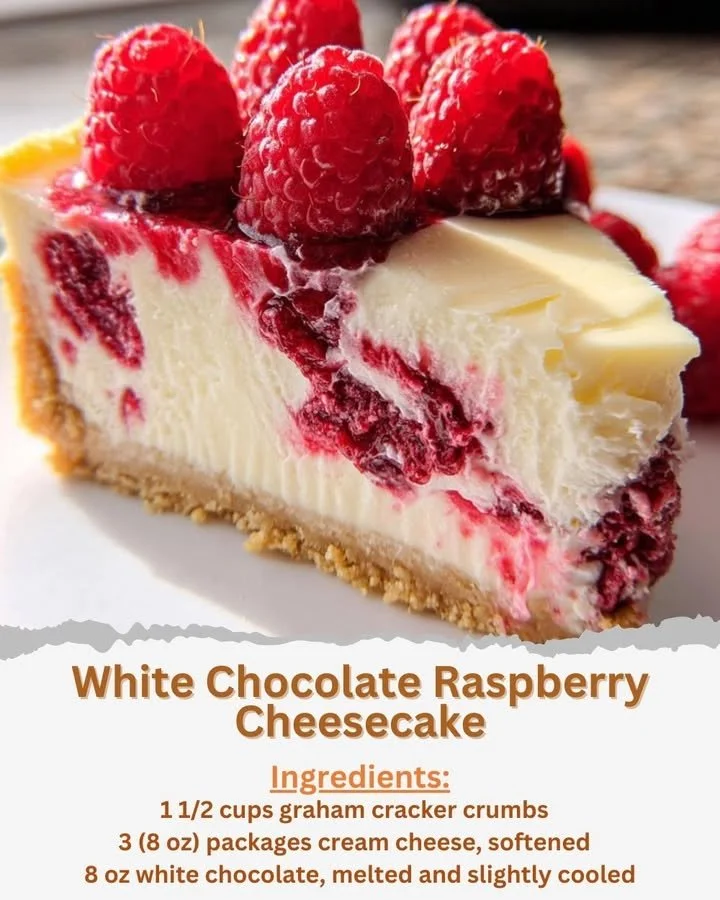
Prepare the crust: In a medium bowl, combine the graham cracker crumbs and melted butter. Mix them well until all crumbs are coated. Press this mixture firmly into the bottom of a 9-inch springform pan to form a solid base.
-
Make the filling: In a large mixing bowl, beat the softened cream cheese on medium speed until it’s smooth and creamy. This step is essential for ensuring a silky texture.
-
Sweeten it up: Gradually add the granulated sugar while continuing to beat the cream cheese. Blend until everything is well combined and fluffy, which typically takes about 2 minutes.
-
Incorporate the eggs: Add the eggs one at a time. After each addition, mix on low speed just until combined. This careful addition helps prevent overmixing, which can lead to cracks in your cheesecake.
-
Flavor it: Stir in the vanilla extract, melted white chocolate, and sour cream until the mixture is smooth and homogenous. The white chocolate adds a tremendous richness that elevates the entire cheesecake.
-
Add the fruit: Gently fold in the fresh raspberries. Be cautious here; you want to keep the raspberries mostly intact to create those beautiful pockets of fruit throughout your cheesecake.
-
Pour it in: Pour the cheesecake batter over the prepared graham cracker crust in the springform pan. Spread it evenly with a spatula.
-
Bake to perfection: Place the springform pan in the oven and bake for 55-65 minutes. The center should be almost set but still have a little jiggle, which is crucial for that creamy texture.
-
Cool it down: Turn off the oven and leave the cheesecake inside with the door slightly ajar for about 1 hour. The gradual cooling process reduces the risk of cracking.
-
Chill: Finally, remove the cheesecake from the oven and chill it in the refrigerator for at least 4 hours, or preferably overnight, before serving. This step allows the flavors to meld beautifully and the texture to solidify perfectly.
Continue reading on the next page 👇👇