Ingredients
The Base
- 1 1/4 cups all-purpose flour
- 1/2 tsp salt
- 1/2 cup unsalted butter, chilled and cut into cubes
- 3-4 tbsp ice water
The Filling
- 1 cup granulated sugar
- 1/3 cup unsweetened cocoa powder
- 1/4 cup cornstarch
- 1/4 tsp salt
- 4 large egg yolks
- 2 1/2 cups whole milk
- 2 tbsp unsalted butter
- 1 tsp vanilla extract
The Topping
- 1 cup heavy cream, chilled
- 2 tbsp powdered sugar
- 1/2 tsp vanilla extract
Instructions on the next page 👇👇
Directions
-
Prepare the Pie Crust: Start by placing 1 1/4 cups of all-purpose flour and 1/2 tsp of salt in a large mixing bowl. Using a pastry cutter or fork, blend in 1/2 cup of chilled unsalted butter until the mixture resembles coarse crumbs. This will set the foundation for a tremendous flaky crust.
-
Form the Dough: Gradually add in 3-4 tbsp of ice water, mixing gently until the dough holds together. Be careful not to overwork it. Once combined, shape the dough into a disk, wrap it in plastic wrap, and refrigerate it for at least 1 hour. This resting period is crucial for a tender crust.
-
Preheat the Oven: While the dough chills, preheat your oven to 375°F (190°C). The warmth will help bring out the flavors of the crust beautifully.
-
Roll and Bake the Crust: After the dough has rested, roll it out on a floured surface into a circle. Carefully transfer it to a 9-inch pie dish, ensuring to gently press it into the bottom and sides. Trim any excess edges and prick the bottom with a fork to prevent bubbling.
-
Weight for Baking: Line the crust with parchment paper and fill it with pie weights or dried beans. Bake for 15 minutes. After this, remove the weights and parchment, then bake for another 10-12 minutes until golden brown. Allow the crust to cool completely.
-
Make the Chocolate Filling: In a medium saucepan, whisk together 1 cup of granulated sugar, 1/3 cup of cocoa powder, 1/4 cup of cornstarch, and 1/4 tsp of salt over medium heat. This mixture will create the heart of your tremendous chocolate pie.
-
Combine with Egg Yolks: In a separate bowl, whisk together the 4 large egg yolks and 2 1/2 cups of whole milk until smooth. Gradually add this mix to the chocolate mixture, stirring constantly.
-
Cook Until Thickened: Continue cooking over medium heat, stirring constantly, until the mixture thickens and begins to bubble. This process should take about 5-7 minutes, transforming your mixture into a silky filling.
-
Finish the Filling: Remove the saucepan from heat and stir in 2 tbsp of unsalted butter and 1 tsp of vanilla extract. The flavors will meld together beautifully at this point.
-
Assemble the Pie: Pour the chocolate filling into the cooled crust and cover it with plastic wrap. This will prevent a skin from forming on the filling. Refrigerate the pie for at least 4 hours, allowing it to set completely.
-
Make Whipped Cream (optional): If you desire a delicious topping, take 1 cup of chilled heavy cream and whip it in a chilled bowl with 2 tbsp of powdered sugar and 1/2 tsp of vanilla extract until you’ve reached stiff peaks.
-
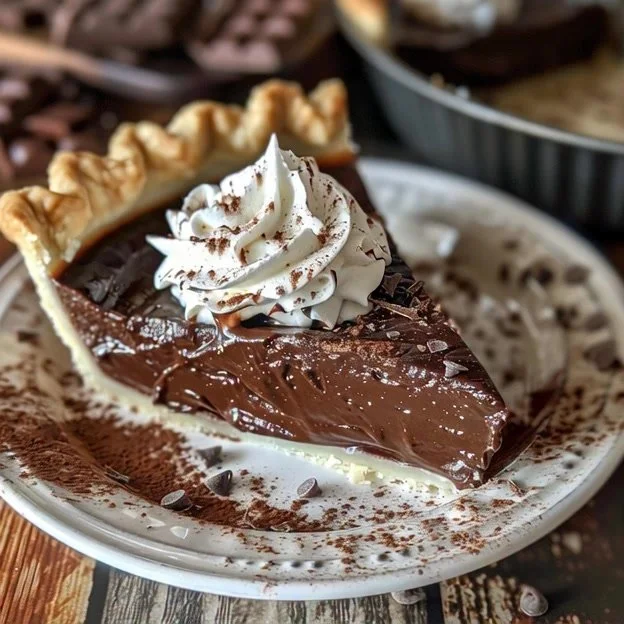
Serve the Pie: Once the pie is set, remove the plastic wrap, top it with the optional whipped cream, slice generously, and serve chilled. Each slice will reveal the tremendous beauty of layers and flavors.
Continue reading on the next page 👇👇
Pro Tips for Success
Perfecting the Pie Crust
- Chill Your Ingredients: Ensure your butter and water are very cold before incorporating them into the flour. This step is key for a flaky crust.
- Don’t Overmix: When combining the flour and butter, mix only until you reach coarse crumbs. Overmixing can lead to a tough crust.
- Allow Cooling Time: After baking, let your pie crust cool completely to prevent the filling from melting the crust integrity.
Crafting the Chocolate Filling
- Whisk Constantly: Pour the filling into the pie crust while it’s still hot for easier spreading. Always keep stirring while cooking to avoid lumps and ensure even cooking.
- Be Patient: Letting the filling cool and set in the refrigerator is vital for the best texture. Rushing this step can result in a soupy filling.
- Add Flavor: Don’t hesitate to experiment—consider a pinch of espresso powder for depth or a touch of orange zest for brightness in the chocolate filling.
Storing and Serving
- Cool Before Covering: Always let the pie cool completely before covering it with plastic wrap to avoid condensation and a soggy crust.
- Keep Chilled: Store any leftovers in the refrigerator to maintain freshness and flavor. Enjoy it cold for a refreshing treat.
- Garnish Just Before Serving: If you decide to use whipped cream, add it just before serving to keep it fluffy and fresh.
Storage and Freshness
The Old-Fashioned Chocolate Pie can be stored covered in the refrigerator for up to 3 days. Keeping it chilled ensures that the filling remains intact and the flavor stays fresh. If you plan on keeping it for longer, consider freezing it without the whipped cream topping, and simply defrost it in the refrigerator before serving.
Final Thoughts
In conclusion, this Old-Fashioned Chocolate Pie is much more than just a dessert; it embodies the essence of shared moments and sweet memories. The tremendous flavors remind us of laughter and love shared at the dinner table. This recipe invites you to carry on the tradition of family baking. What cherished memories do you have of baking with loved ones? Embrace the joy of creating your own with this delightful pie.