Directions
-
Preheat your oven to 325°F (160°C). Line a cupcake tin with cupcake liners, aiming for about 12 opportunities for these tremendous treats.
-
In a medium bowl, combine graham cracker crumbs, sugar, and melted butter, creating a sandy mixture. Press about a tablespoon of this crust mixture into the bottom of each cupcake liner, establishing a solid base.
-
In a large bowl, beat the softened cream cheese and the ½ cup of granulated sugar together until the mixture is smooth and free of lumps.
-
Add the eggs, one at a time, continuing to beat well after each addition, ensuring that they are fully incorporated for that tremendous creamy texture.
-
Mix in the lemon zest, lemon juice, and vanilla extract, stirring until everything is well combined, resulting in a fragrant and uplifting cheesecake mixture.
-
In a small bowl, mix either the raspberry preserves or the freshly mashed raspberries with the lemon juice and sugar, creating a delightful raspberry swirl mixture.
-
Using a spoon, carefully spoon the cheesecake batter evenly into the cupcake liners, filling each about three-quarters full.
-
Gently drop small spoonfuls of the raspberry mixture on top of the cheesecake batter in each cup.
-
Take a toothpick or skewer and gently swirl the raspberry mixture into the cheesecake batter. This will create a stunning marbled effect that’s as pleasing to the eye as it is to the palate.
-
Bake the cupcakes for about 20 to 25 minutes, or until the cheesecake is set and the edges appear slightly golden.
-
Remove the cupcake tin from the oven and allow it to cool in the pan for ten minutes. Then, transfer the cupcakes to a wire rack to cool completely.
-
Once cooled, refrigerate the cupcakes for at least 2 hours, or until they are fully chilled and ready to be enjoyed.
-
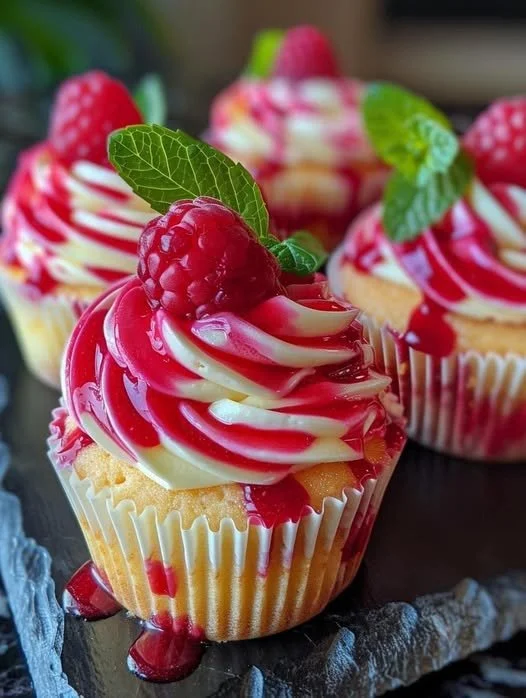
Serve these adorable and delicious Lemon Raspberry Swirl Cheesecake Cupcakes chilled, and watch as they become the star of your dessert table.
Continue reading on the next page 👇👇