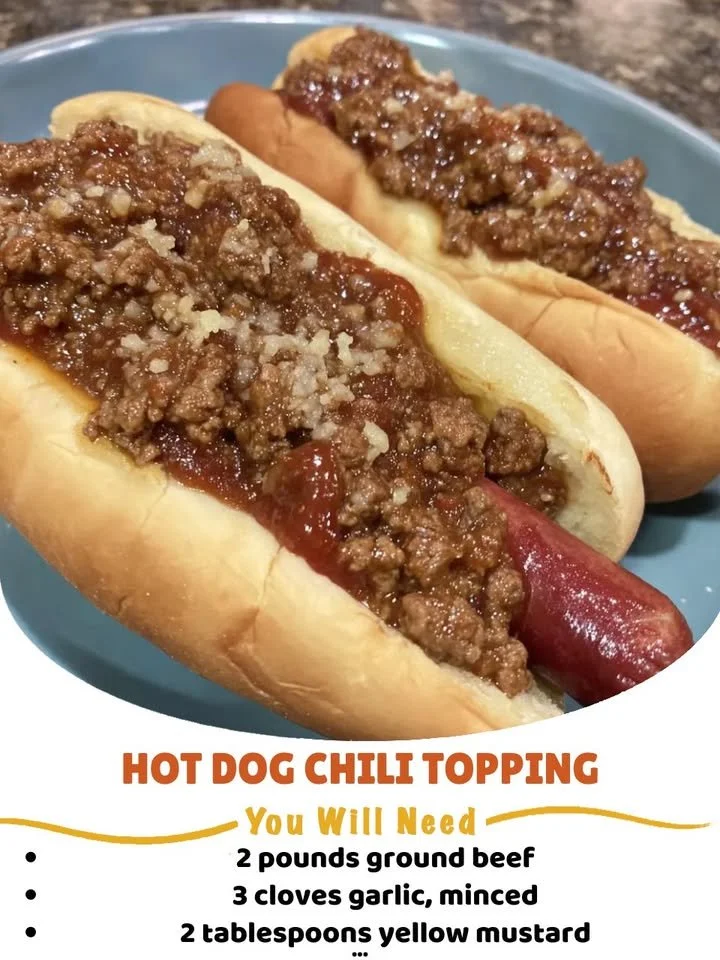
Ingredients
The Filling
- 2 pounds ground beef
- 3 cloves garlic, minced
- 1 onion, chopped
- 1 can (15 oz) kidney beans, drained and rinsed
The Base
- 1 can (15 oz) tomato sauce
- 2 tablespoons chili powder
- 1 teaspoon cumin
- 1 tablespoon brown sugar
- Salt and pepper to taste
Instructions on the next page 👇👇
Directions
-
In a large skillet, brown the ground beef over medium heat until fully cooked. Make sure to drain the excess fat, as you want your chili to be hearty but not greasy.
-
Next, add the minced garlic and chopped onion to the skillet. Sauté until the onion is softened and translucent, which should take about 3-4 minutes. The aroma is tremendous at this stage, filling your kitchen with a wonderful scent.
-
Stir in the kidney beans, tomato sauce, chili powder, cumin, brown sugar, and season with salt and pepper. Make sure to mix everything thoroughly so that the tremendous flavors meld together nicely.
-
Once combined, reduce the heat to low and let the chili simmer for about 20 minutes. This allows the flavors to deepen and intensify, creating a sauce that you will want to spoon generously over your hot dogs.
-
Finally, serve the chili hot over cooked hot dogs. You can also add additional toppings like shredded cheese or chopped onions if you wish to elevate your dish even further.
Continue reading on the next page 👇👇
Pro Tips for Success
Taste as You Go
- Adjust the Flavor: Don’t hesitate to taste your chili as it simmers. This way, you can adjust the seasoning to your preference. If it’s too sweet, add a bit more chili powder for heat; if it’s too spicy, a pinch of sugar will help balance things out.
- Fresh Ingredients: Use fresh garlic and onions for the best flavor. Fresh herbs can also be tossed in at the end for an extra layer of taste.
Cooking Techniques
- Browning the Meat: Make sure to brown the ground beef properly; this step adds tremendous depth to your dish. Use a fork to break up the meat and get it nice and crumbly rather than clumping together.
- Even Simmering: Keep the heat low during the simmering process. This ensures that the flavors develop more profoundly and prevents the chili from sticking to the bottom of the skillet.
Storage and Serving
- Plan Ahead: Make this chili a day in advance. The flavors will have more time to meld together, resulting in a more tremendous taste.
- Serving Size: This recipe yields enough chili for around 8 hot dogs. Adjust your serving size accordingly for your guests or family to ensure everyone enjoys a generous helping.
Storage and Freshness
Refrigeration
- Cooling Down: Allow the chili to cool completely before transferring it to an airtight container. This prevents condensation from forming, keeping it fresh for longer.
- Refrigerate: Store your chili in the refrigerator for up to 4 days. Reheat thoroughly before serving.
Freezing
- Freezable Meal: The hot dog chili freezes wonderfully. Portion it into freezer bags, making sure to remove as much air as possible. It can be kept in the freezer for up to 3 months.
- Thawing: Thaw in the refrigerator overnight when you’re ready to enjoy it, then reheat on the stovetop.
Reheating
- Gentle Heating: Always reheat your chili gently over low heat to maintain its texture. Stir occasionally to ensure uniform heating.
Final Thoughts
As you savor each bite of your hot dog topped with this tremendous chili, remember that food has a remarkable ability to transport us back to cherished moments. This dish is not only about nourishment but also about connection, community, and tradition. Whether it’s a weekday dinner or a weekend barbecue, the joy it brings is undeniable. What memories do you associate with a delicious hot dog, and how will you make this recipe your own?