Ingredients
The Base
- 1 box of Hershey’s chocolate cake mix
- 3 large eggs
- 1 cup water
- 1/2 cup vegetable oil
The Filling
- 1 package (8 oz) cream cheese, softened
- 1/2 cup granulated sugar
- 1 teaspoon vanilla extract
- 1 cup sour cream
The Ganache
- 1 cup heavy cream
- 1 cup semi-sweet chocolate chips
Instructions on the next page 👇👇
Directions
-
Preheat the oven to 350°F (175°C). Grease and flour two 9-inch round cake pans. This step is crucial as it ensures easy removal of the cake layers later on.
-
In a large bowl, combine the chocolate cake mix, eggs, water, and vegetable oil. Mix until smooth and well combined. The batter should be a tremendously rich and glossy texture, signaling that it’s ready for the next step.
-
Pour half of the cake batter into each prepared cake pan. You want even layers for the best presentation and taste, so take your time measuring.
-
In another bowl, beat together the cream cheese, granulated sugar, and vanilla extract until smooth. It’s important to ensure there are no lumps for the best cheesecake filling.
-
Fold in the sour cream into the cream cheese mixture until fully combined. This addition gives your cheesecake a beautiful tang and a delightful creaminess.
-
Spoon the cream cheese mixture evenly over the cake batter in the pans. This layer will bake beautifully, melding into the chocolate and creating a phenomenal flavor combination.
-
Bake for 30-35 minutes or until a toothpick inserted in the cake comes out clean. The cake should be firm yet springy to the touch when it’s perfectly baked.
-
Let the cakes cool in the pans for 10 minutes, then remove from pans and cool completely. Patience is key here; a cool cake ensures better ganache application later.
-
For the ganache, heat the heavy cream in a saucepan until warm. Pour over the chocolate chips and let sit for about 5 minutes. Stir until smooth, creating a wonderfully glossy finish for your cake.
-
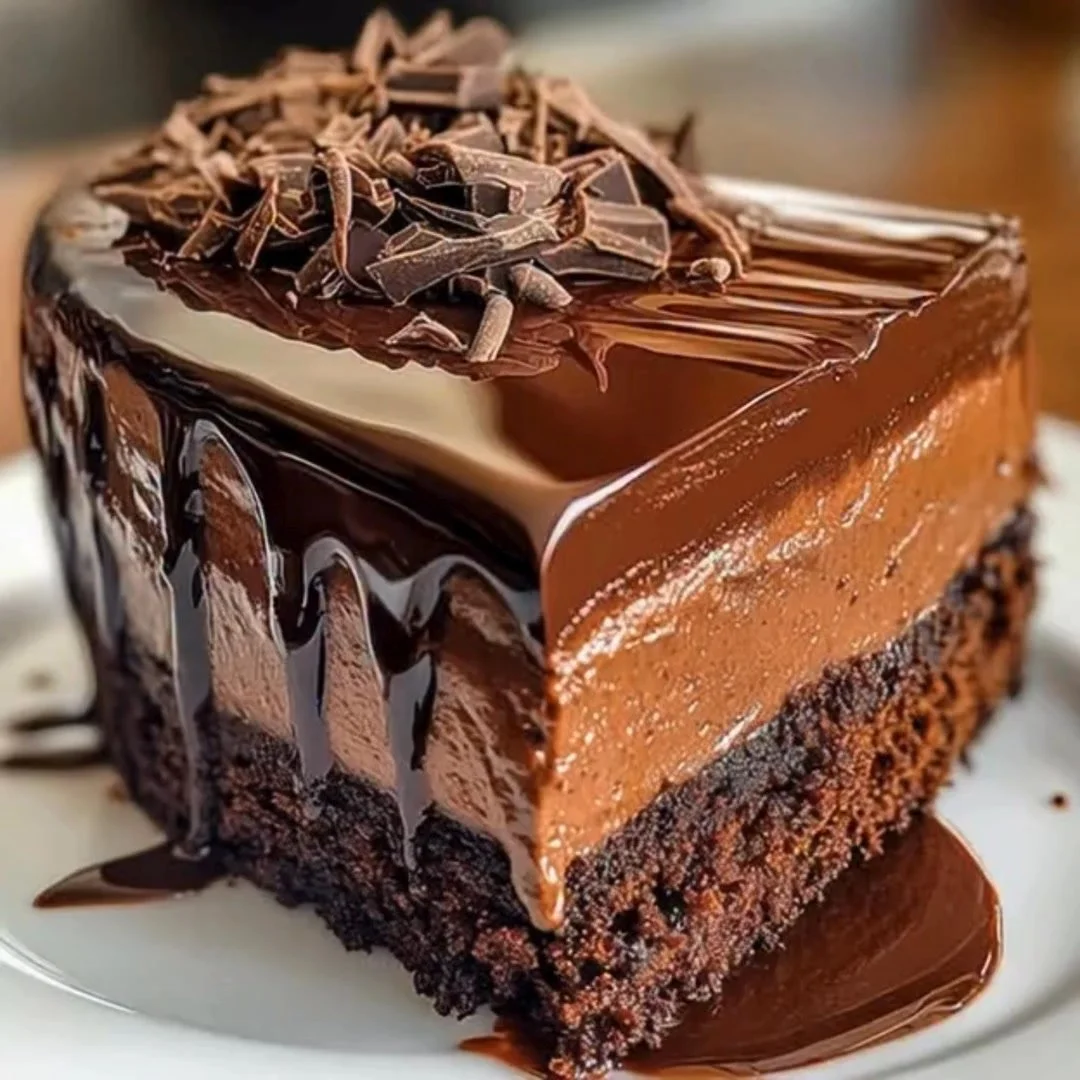
Assemble the cake by placing one layer on a serving platter. Spread a generous amount of ganache on top, add the second layer, and drizzle remaining ganache over the top and sides.
-
Chill the assembled cake before serving. This will firm up the ganache and enhance the flavors, giving you a splendid dessert experience.
-
Enjoy your delicious Hershey’s Chocolate Cheesecake Cake! Serve it with a smile and watch the joy unfold as family and friends savor each bite.
Continue reading on the next page 👇👇
Pro Tips for Success
Create a Neat Finish
- Always ensure your cake layers are completely cool before frosting. This prevents melting or sliding, allowing for a clean and professional appearance.
Use Quality Ingredients
- Using high-quality chocolate chips will enhance the flavor of the ganache and the overall taste of the cake. Look for semi-sweet or dark chocolate for a more robust taste.
Be Mindful of Mixing
- When combining your cake batter, mix just until ingredients are incorporated. Over-mixing can lead to a dense cake. A smooth batter is key to a fluffy result.
Storage and Freshness
Keep it Chilled
- After assembling your cake, store it in the refrigerator. The cool temperature helps maintain its structure and enhances the chocolate flavors.
Cover Properly
- To avoid drying out, wrap the cake in plastic wrap or place it in an airtight container. This seals in moisture and keeps your cake fresh for several days.
Enjoy Quick Leftovers
- If you have leftover cake, cut it into slices and portion it out into individual containers. It allows for easy access and can be a quick treat any time of day.
Final Thoughts
Baking a Hershey’s Chocolate Cheesecake Cake is not just about creating dessert; it’s about crafting memories that linger on with each delicious bite. The layers of flavor and texture invite everyone to gather together, enjoy, and celebrate. This cake is not only a feast for the eyes but also a source of comfort and happiness.
As you embark on this tremendous culinary adventure, what occasion will you bake this rich and delightful cake for?