Directions
-
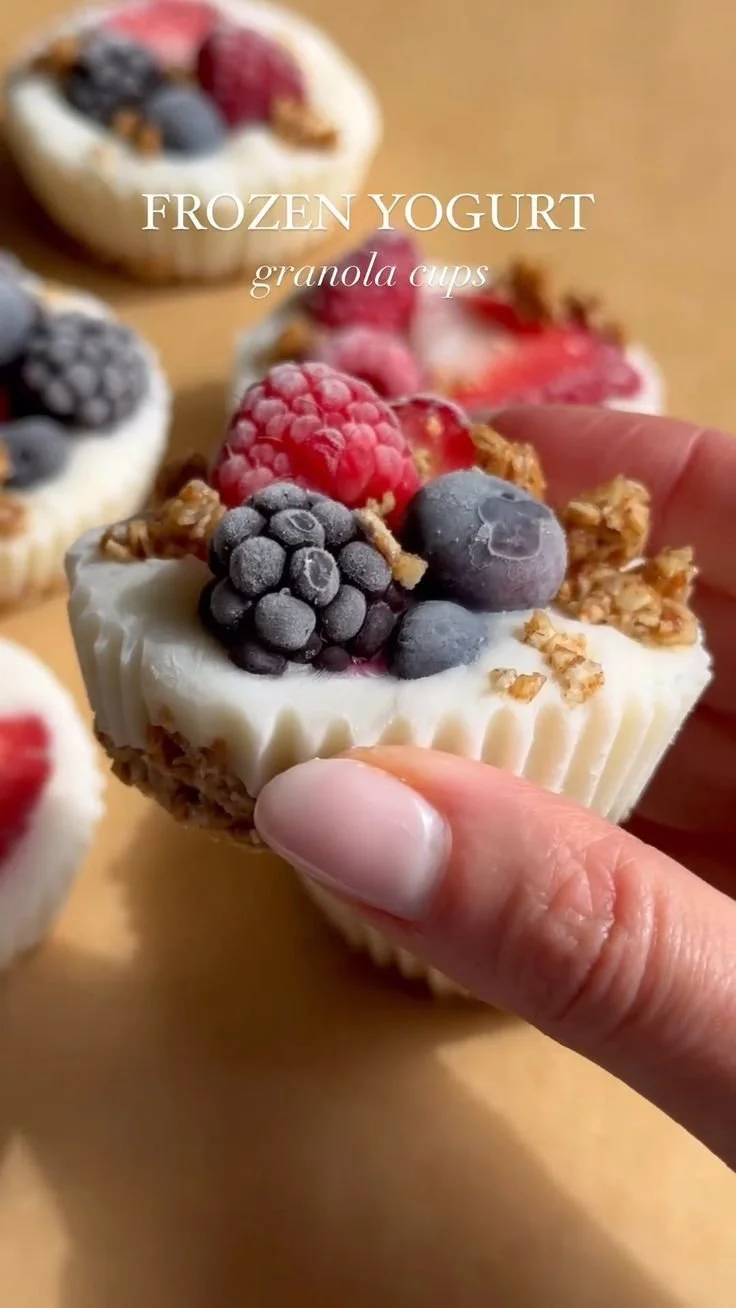
Base: In a medium-sized bowl, mix the rolled oats, ground cinnamon, almond butter, honey, and vanilla extract until a sticky dough forms. This sticky consistency is crucial, as it will hold your granola base together beautifully. The tremendous aroma of the vanilla enhances the mix, making the process even more enjoyable.
-
Line: Prepare your muffin tin by placing 12 liners in each cup. This is essential for easy extraction later. You want to ensure that your power cups come out effortlessly, leaving you with a perfectly shaped dessert.
-
Press: Distribute the granola mixture evenly across the liners, pressing down firmly to create a solid base. Ensure evenness so that each cup has just the right amount of crunch. The tremendous effort you put into this step will pay off when you experience that delightful snap of granola with every bite.
-
Fill: Once the base is ready, it’s time to top it with a generous dollop of Greek yogurt, about 2 tablespoons per cup. This layer signifies the transition from base to filling, bringing a tremendous creaminess that balances the crunch below.
-
Top: Make the cups even more enticing by pressing fresh berries into the yogurt layer. Feel free to use a mix of strawberries, blueberries, and raspberries for a colorful and flavorful topping. Sprinkle any remaining granola crumbles on top for added texture.
-
Freeze: Place the muffin tin in the freezer and let it sit for a minimum of 4 hours until the yogurt is completely solid. The tremendous chill will ensure that your cups hold their shape when served.
-
Serve: After freezing, remove the cups from the freezer and allow them to sit for 3–5 minutes. This makes it easier to peel off the liners. Enjoy your delicious creation with family or friends, or perhaps indulge in a solitary moment of bliss.
Continue reading on the next page 👇👇