Ingredients
The Filling
- 8 oz cream cheese, softened to room temperature
- 1/4 cup granulated sugar
- 1 large egg
- 1 teaspoon vanilla extract
The Base
- 12 vanilla wafers or graham cookies
- Cherry pie filling (canned, as needed for topping)
Instructions on the next page 👇👇
Directions
-
Preheat the Oven: Start by preheating your oven to 325°F (165°C). This step is crucial as it sets the stage for our mini cheesecakes to bake to perfection.
-
Prepare the Muffin Tin: Take a standard 12-cup muffin tin and line it with paper liners. These liners will not only make clean-up easier but also help maintain the shape of the cheesecakes while they bake.
-
Base Layer: Place one vanilla wafer or graham cookie at the bottom of each liner. This will be the crunchy base holding our tremendous filling. It adds an excellent texture contrast against the creamy cheesecake.
-
Mix the Filling: In a large mixing bowl, beat together the softened cream cheese and granulated sugar until the mixture is smooth and creamy. Use a hand mixer or a whisk, but a mixer will make this step faster. Then, add the large egg and vanilla extract. Mix just until combined—over-mixing can introduce air into the batter, affecting the texture.
-
Fill the Liners: Spoon the cheesecake batter into each liner, filling them about three-quarters full. This will give them room to rise and set beautifully in the oven.
-
Bake: Carefully place the muffin tin in the preheated oven. Bake for about 15-18 minutes. The centers should be set, but they may still have a slight jiggle; this is normal. A tremendous treat is coming your way!
-
Cool Down: Once baked, remove the cheesecakes from the oven and let them cool completely at room temperature. After that, place them in the refrigerator for at least 1 hour. This chilling period is vital for enhancing the flavors and allowing the mini cheesecakes to firm up nicely.
-
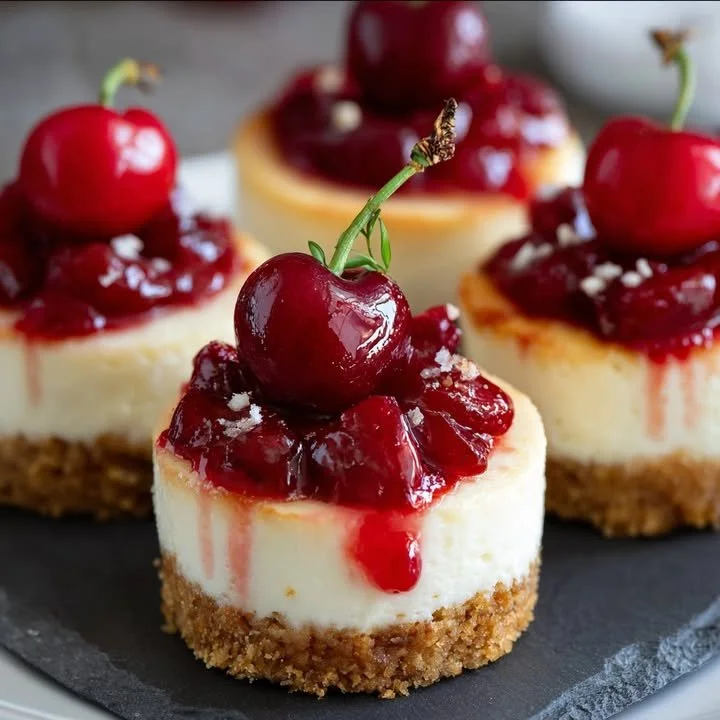
Add the Topping: Just before serving, top each mini cheesecake with a generous spoonful of cherry pie filling. The sweet, tart cherries beautifully complement the creamy filling and add a lovely splash of color.
Continue reading on the next page 👇👇
Pro Tips for Success
Tip 1: Softened Cream Cheese is Key
Make sure your cream cheese is at room temperature before mixing. This will help achieve a smooth and creamy filling without lumps.
Tip 2: Don’t Overmix the Filling
When adding the egg and vanilla, mix just until combined. This will ensure your minis remain dense and rich, creating that tremendous cheesecake texture.
Tip 3: Chill the Cheesecakes
Do not skip the chilling step! Refrigerating allows the flavors to meld and gives the cheesecake a more delightful consistency.
Storage and Freshness
Tip 1: Store in the Refrigerator
These mini cheesecakes can be kept in the refrigerator for up to 5 days. Make sure they are covered tightly to maintain freshness.
Tip 2: Top Just Before Serving
For the best flavor and texture, only add the cherry topping before serving. This keeps the base and filling intact and fresh.
Tip 3: Freezing for Later
You can freeze the mini cheesecakes without the topping for up to 2 months. Just thaw in the refrigerator overnight before serving.
Final Thoughts
These Easy Mini Cherry Cheesecakes are a tremendous way to indulge in a sweet treat that’s easy to make and irresistibly delicious. Each bite brings a sense of warmth and home, making them perfect for any gathering or even a quiet evening at home. Have you ever tried adding different fruits or toppings to cheesecakes? What would you choose for your next variation?